How to Do Some Basic Drywall Repairs
Drywall is quite simple to install and uncomplicated to repair. However, it is also easy to get it wrong and leave a lumpy mess that will ruin the collective feel and aesthetics of the room.
First things first, repairing drywall requires at least three or four thin layers/coats of the compound. Possibly even leaving sanding for the very last coat. Also, while repairing drywall, it is important to build the joint out wider than usual. Basically, leave a spacious and very superficial incline on all sides of the wall.
Installing and repairing drywall, also known as sheetrock, rock, or wallboard, is an important part of building a house. Before the widespread use of drywall, it would take long amounts of time to build a foundation that would hold paint or wallpaper. Now, you can easily install your own drywall in hours, depending on how large the room is.
Drywall Toolkit
To stock up your basic drywall toolkit, you actually do not need sophisticated gadgets. A basic drywall toolkit should contain a set of flexible knives of 3-, 6- and 8-in. widths, a drill, a utility knife, a screwdriver, a hammer, an inside-corner knife, drywall compound, mesh tape, paper tape, drywall nails, and screws and a portable drywall saw.
In some cases, you may need a hand sander, a nail bar, a level, and a hacksaw.
Safety Tips
Watch the weight
Be advised that a sheet of regular 1/2-in. drywall can weigh up to 1.7 pounds per square foot. If you do the math properly, that means a 1/2-inch. 4 x 8-ft. sheet would weigh around 54 pounds. That simply means, if you have several large repairs to undertake and you buy a sheet or two of drywall, be careful whilst handling it because if it falls over, someone–especially a child–could get hurt.
Beware of buckets
Five-gallon compound buckets typically used in repairs like this can pose a drowning or suffocation hazard to small children both when they are new and filled with compound, or later after they are cleaned and alternatively used for car washing and other jobs. Keep children away from these buckets.
Clean up the dust
It is important to mention that dust from drywall sanding is a respiratory irritant. Experts’ advice that a dust mask be worn when sanding to block airborne gypsum and silica particles from getting into the respiratory tract. Also, it is important to spread a plastic drop-cloth close by. After sanding, wipe dust off the drop-cloth with a moist sponge, then tidy up the surrounding areas with a shop vacuum, let the air settle, and use your household vac to vacuum whatever is left.
Basics of Drywall
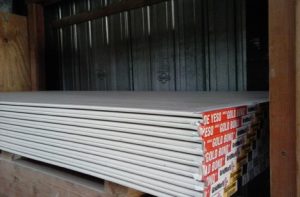
- Understand that drywall usually comes in 4’x8′ sheets: However, larger 4’x12′ sheets exist but are harder to work with and are usually used by professionals and may even require a few extra hands. These bigger sheets tend to break easily during conveyance to the location site, although they typically require less work because the larger sheets mean fewer joints to tape. Drywall is typically installed horizontally but can be installed vertically if preferred.
- Know that thicknesses range from 1/4″ – 5/8,” with 1/2″ being the most popular: The 1/4″ sheets are often used as overlays to existing drywall and are not intended to be used in new construction. Check your local building code for requirements in your area.
- Consider the structure of your drywall: When picking drywall, use compositions that will be suitable for the environment they will be installed in. For instance, there are different moisture-resistant products normally called “green rock”, intended for installation in areas with high humidity such as garages and bathrooms. Green rocking the whole house may be a bit much and even though it is suitable for areas of high humidity, it should not be placed in places where it is most likely to get wet. Do not use it to line the bathtub or shower. Rather, use bath tiles or glass-reinforced cement boards. Ensure you are familiar with your local building supply store before committing to purchase.
Repairing Some Common Drywall Issues
Dent in Drywall
Dents in drywall are very prevalent and are incredibly easy to repair as follows:
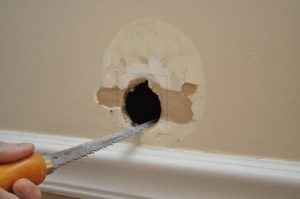
- Apply spackle or premixed drywall joint compound to the affected area using a 4 to 6-inch flat blade taping knife (the cheap, one-use plastic-type will suffice too).
- Lightly sand using a sanding block and about 200 grit sandpaper after 24 hours wait for the compound to be fully dry. Sanding using your hand or fingers is a bad idea! You must have a solid backing to the sandpaper for suitable results!
- Check the repair area once it is dry. If you notice the compound shrunk or you see pitting, repeat the application of joint compound and sanding.
- You can prime and paint. That means, once the repair is dry and sanded smooth, close your eyes and feel the repair area with your hand. It should be somewhat smooth to the touch.
Repairing Split or Bubbled Drywall Joint Tape
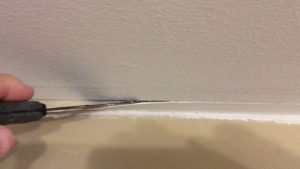
Fixing tape problems are more complex than fixing nail pops or fixing drywall dents because you will be pulling off the paper tape that is about 2 inches wide, thereby forming a larger repair area. However, it is not hard to restore if you proceed as follows:
- Carefully pull off the damaged portion of tape after you have cut away the damaged section of drywall tape using a very sharp knife or breakaway razor utility tool. You will also be removing tiny bits of dried drywall joint compound. That is perfectly okay.
- Apply premixed drywall joint compound in the exposed drywall joint as a bedding for the new tape using a 4-inch drywall flat blade taping knife (again, the low-cost plastic-type is okay). Make sure to adequately apply the compound so it fully covers the tape’s width and length.
- Cut your new section of drywall tape to length.
- Using your slightly wetted 4-inch drywall flat blade taping knife, center the drywall tape on the joint and while holding the taping knife at about a 45-degree angle, run the knife down along the tape, pressing it fully and firmly into the joint compound bedding. The compound will seep out around the edges and that is a good sign.
- Scour away any raised spots with the taping knife the next day, after allowing to dry overnight.
- Using a slightly wetted 10-inch taping knife, directly apply an additional coat of premixed joint compound that is 6 to 8 inches in width and covers the first coat of compound.
- Remove any surplus from the edges. You can do this by holding your taping knife more at a 90-degree angle to the taped joint and drawing it down in one even stroke. What you want to achieve is for the taped area to be fairly smooth. It may have some bubbles in it but that is OK.
- Scrape away any raised spots with the taping knife the next day after letting the joint compound to dry overnight.
- Smear the third and final coat of joint compound to an area that is about 8 to 10 inches wide again using a considerably wetted 10-inch taping knife.
- Gently sand using a sanding block and about 200 grit sandpaper after you have allowed the joint compound to dry overnight. Scrape away any high spots using the taping knife the next day.
- Ensure you re-check your repairs once dry. If you discover that the compound has reduced in size or you see pitting, repeat the application of joint compound and sanding.
- You can prime and paint at the same time. That simply means you can close your eyes and feel the repair with your hand once the repair is dry and sanded smooth.


